For this guide I am following this post.
Requirements
For this guide you will need an up to date Ubuntu Server 14.04 virtual or physical machine.
Update your operating system. If you’re on Ubuntu, its a simple process. Simply type
user@websvr:~$ sudo apt-get update
After that, just type
user@websvr:~$ sudo apt-get upgrade
This will download updates for all the installed software. When that finishes, we need to grab the dependencies for nginx. Type or paste the following into the server.
user@streamsvr:~$ sudo apt-get install build-essential libpcre3 libpcre3-dev libssl-dev
Now that we have the dependencies, we can download the source code of nginx from their webpage. As of this post, the most recent version is 1.7.4. To download it, type the following.
user@streamsvr:~$ wget http://nginx.org/download/nginx-1.7.4.tar.gz
We also need to grab the RTMP module because it isn’t included in the main nginx distribution.
user@streamsvr:~$ wget https://github.com/arut/nginx-rtmp-module/archive/master.zip
Before we continue, we need to install the unzip program.
user@streamsvr:~$ sudo apt-get install unzip
Now we open the archives we downloaded and get cracking!
 user@streamsvr:~$ tar -zxvf nginx-1.7.4.tar.gz
user@streamsvr:~$ unzip master.zip
user@streamsvr:~$ cd nginx-1.7.4/
We can now configure the source and build the binary.
user@streamsvr:~/nginx-1.7.4$ ./configure --with-http_ssl_module --add-module=../nginx-rtmp-module-master
user@streamsvr:~/nginx-1.7.4$ make
user@streamsvr:~/nginx-1.7.4$ sudo make install
Now nginx is installed! It is install ed in /usr/local/nginx. To start it type
user@streamsvr:~$ sudo /usr/local/nginx/sbin/nginx
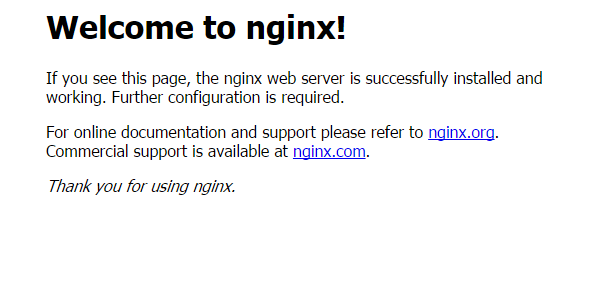
Test it by going to your server IP with your web browser. It should display the following:
We are almost done. To add RTMP functionality, we must enable it in the nginx configuration file.
user@streamsvr:~$ sudo nano /usr/local/nginx/conf/nginx.conf
Paste this in at the end of the file.
rtmp {
        server {
                listen 1935;
                chunk_size 4096;

                application live {
                        live on;
                        record off;
                }
        }
}
To save, hit Crtl+x , yes, and enter.
To make the rest of the project easier, we should make nginx into a system service that runs automatically and can be controlled with the service command.
sudo nano /etc/init/nginx.conf
Paste this into the file
# nginx

description "nginx http daemon"
author "Philipp Klose <me@'thisdomain'.de>"

start on (filesystem and net-device-up IFACE=lo)
stop on runlevel [!2345]

env DAEMON=/usr/local/nginx/sbin/nginx
env PID=/var/run/nginx.pid

expect fork
respawn
respawn limit 10 5
#oom never

pre-start script
 $DAEMON -t
 if [ $? -ne 0 ]
 then exit $?
 fi
end script

exec $DAEMON
We can now start and stop nginx with the sudo service nginx start | stop | restart commands. Yes! It will also start when the server boots, so you don’t need to worry about that.
Next we need to go back to the nginx configuration file and prepare it for stats delivery. The ability to display server statistics will be crucial to this project. This page will ensure that live streams have the correct pages generated for them.
Go back to the nginx configuration and add the following inside the server directive in the /usr/local/nginx/conf/nginx.conf.
# rtmp statistics
        location /viewers {
            rtmp_stat all;
            rtmp_stat_stylesheet stat.xsl;
        }

        location /stat.xsl {
            # you can move stat.xsl to a different location
            # under linux you could use /var/user/www for example
            root html;
}
The server directive should now start like this:
server {
listen 80;
server_name localhost;

#charset koi8-r;

#access_log logs/host.access.log main;

location / {
root html;
index index.html index.htm;
}
#rtmp statistics
location /viewers {
rtmp_stat all;
rtmp_stat_stylesheet stat.xsl;
}

location /stat.xsl {
# you can move stat.xsl to a different location
# under linux you could use /var/user/www for example
root html;
}
#error_page 404 /404.html;
We have to do one more quick thing before the stats page will work. In order to generate the XML, the RTMP module uses an XSL file. This will need to be placed in the HTML root of the nginx server. Create a file called stat.xsl containing the following. Save it, and we should be good to go. For whatever reason, pasting the stat.xsl file into this page is messing things up, so I’ll just include a link to the file.
user@streamsvr:~$ sudo nano /usr/local/nginx/html/stat.xsl
After you paste that in, save the nginx configuration. Restart the entire server. After it boots should be able to see the rtmp server stats if you go to your server IP address /viewers.
And that’s it for the nginx-rtmp installation/configuration. The server is now running and ready for the next section of this series… Web server configuration and scripting!

Pingback: Local RTMP server with Website | WillStare