If you have been following these tutorials, you should now have a fully functional Nginx RTMP server as well as a WordPress site optimized for showing live streams.
We just need to install a few more things and this project will be complete!
The first package we need is wp-cli. This program will allow us to modify our WordPress site from the CLI! Cool!
user@websvr:~$ wget https://raw.githubusercontent.com/wp-cli/builds/gh-pages/phar/wp-cli.phar
Check to see if it works by typing
user@websvr:~$ php wp-cli.phar --info
If it works, we can make it an executable so you just type “wp” to call it.
user@websvr:~$ chmod +x wp-cli.phar

user@websvr:~$ sudo mv wp-cli.phar /usr/local/bin/wp
That’s all we have to do to enable wp-cli. Next we need to install xmlstarlet, a utility to parse xml files.
user@websvr:~$ sudo apt-get install xmlstarlet
After that installs, we are finished adding software to the server. Everything else should be included in your distro.
The script we will be using automatically generates .m3u playlist files that will need a directory in the webserver to reside. I like to use an ‘assets’ folder, but you can name it anything you’d like. Make a folder in the www root of your webserver, where WordPress is installed. After we create the folder, we must ‘chown’ it, which means change owner. Change ownership to the user that will be running the script.
 user@websvr:~$ sudo mkdir /var/www/html/assets/

user@websvr:~$ sudo chown user /var/www/html/assets/
What follows is a custom script that will allow the WordPress site to update based on the status of the nginx RTMP server. It will require some input before you run it, but once its set it can take care of itself.
#!/bin/bash

#MASTER contains a list of registered usernames for the event. To clear it, simply delete the file!
MASTER="rtmp_users.list"

#Enter the path to this script. Follow this syntax. Note the absence of a trailing '/' (ex: /home/user/scripts)
SCRIPT_PATH=
#Enter the path to your WordPress installation. Follow this syntax. Note the absence of a trailing '/' (ex: /var/www/html)
WP_PATH=
#Enter the URL of the Nginx statistics page. (ex: http://10.0.0.241/stats)
NGINX_STATS=
#Enter the path to the HTML assets folder. This is where the server will hold the .m3u files. YOU MUST CHOWN this folder! (ex: /var/www/html/assets)
ASSETS=
#Enter the URL to the assets folder. (ex: http://10.0.0.241/assets)
WEB_ASSETS=
#Enter the RTMP server path. (ex: rtmp://10.0.0.242/live)
RTMP_PATH=
#Optional: Enter the path to a background image for JWPLayer. (ex: http://10.0.0.241/assets/site_logo.png)
IMAGE_PATH=
#Changes directory to the script-path for execution (required for cron)
cd $SCRIPT_PATH
#Creating the master list file.
MASTER="rtmp_users.list"
/bin/touch $MASTER
/bin/touch toadd.list
/bin/rm toadd.list
/bin/touch toadd.list
#Getting the current statistics from the streaming server
wget -O stats.xml $NGINX_STATS
#Parsing the XML file to get all the handles/keys currently streaming. These should correspond with the usernames of the streamers.
xmlstarlet sel -t -m '//name' -v . -n <stats.xml | grep -v live > livestreams.list
#The loop below cycles through the livestreams.list file and compares each line to the current master list. If it doesn't exist, it adds it to the master list. It also adds it to the list of things we need to add to the website.
while read NAME
do
if ! /bin/grep -Fxq $NAME $MASTER; then
echo $NAME >> $MASTER
echo $NAME >> toadd.list
fi
done <livestreams.list
#Getting the existing post titles and ID's from WordPress. These will be compared to the currently active streams.
/usr/local/bin/wp --path=$WP_PATH post list --post_type=page --fields=ID,post_title > $SCRIPT_PATH/id_title.list
#Loop to find names to add. If they don't exist, a new page is created for them. This will display at the top of the menu. It is currently empty at this stage.
while read NEW; do
if ! /bin/grep $NEW id_title.list; then
/usr/local/bin/wp --path=$WP_PATH post create --post_type=page --post_status=publish --post_title=$NEW
fi
done <$MASTER
#The loop below checks to see if the stream is currently live or dead (depends on if its in the livestreams.list file). If its live, it generates a page with the relavent
#stream information customized for the user. If its dead, it will generate a dead page to notify browsers that the user is not currently streaming. This loop will update
# ALL streams in the master_rtmp.list as often as the cronjob is executed.
while read STREAM; do
ID=`/usr/local/bin/wp --path=$WP_PATH post list --post_type=page --fields=ID,post_title | /bin/grep $STREAM | /usr/bin/awk '{print $1}'`
if /bin/grep $STREAM livestreams.list; then
echo $STREAM" is online"
/bin/echo $RTMP_PATH/$STREAM > $ASSETS/$STREAM.m3u
/bin/echo "<html>" >> $STREAM.livetemplate.html
/bin/echo "<head>" >> $STREAM.livetemplate.html
/bin/echo "<script src=http://jwpsrv.com/library/UjjVOi7iEeSiiiIAC0MJiQ.js></script>" >> $STREAM.livetemplate.html
/bin/echo "</head>" >> $STREAM.livetemplate.html
/bin/echo "<body>" >> $STREAM.livetemplate.html
/bin/echo "<div id="$STREAM"></div>" >> $STREAM.livetemplate.html
/bin/echo "<script>// <![CDATA[" >> $STREAM.livetemplate.html
/bin/echo "jwplayer('"$STREAM"').setup({ file: '"$RTMP_PATH/$STREAM"', image: '//"$IMAGE_PATH"', title: '$NEW', width: '100%', aspectratio: '16:9' });" >> $STREAM.livetemplate.html
/bin/echo "// ]]></script>" >> $STREAM.livetemplate.html
/bin/echo $STREAM" is online and streaming as of "`date` >> $STREAM.livetemplate.html
/bin/echo "<a href="$WEB_ASSETS/$STREAM".m3u>VLC LINK</a> (Right Click and Save-as)" >> $STREAM.livetemplate.html
/bin/echo "</body>" >> $STREAM.livetemplate.html
/bin/echo "</html>" >> $STREAM.livetemplate.html
LIVE_HTML=`cat $STREAM.livetemplate.html`
/usr/local/bin/wp --path=$WP_PATH post update $ID --post_content="$LIVE_HTML"
/bin/rm $STREAM.livetemplate.html
else
/bin/echo $STREAM" is offline"
/bin/echo "<html>" >> $STREAM.deadtemplate.html
/bin/echo "<head></head>" >> $STREAM.deadtemplate.html
/bin/echo "<h1>"$STREAM" is not streaming as of "`date`" </h1>" >> $STREAM.deadtemplate.html
/bin/echo "<body>" >> $STREAM.deadtemplate.html
/bin/echo "Page is regenerated every 60 seconds, please check again shortly." >> $STREAM.deadtemplate.html
/bin/echo "If this is your stream and it should be running, please contact an event administrator." >> $STREAM.deadtemplate.html #This string can be modified to meet your requirements.
/bin/echo "</body>" >> $STREAM.deadtemplate.html
/bin/echo "</html>" >> $STREAM.deadtemplate.html
DEAD_HTML=`cat $STREAM.deadtemplate.html`
/usr/local/bin/wp --path=$WP_PATH post update $ID --post_content="$DEAD_HTML"
/bin/rm $STREAM.deadtemplate.html
fi
done <$MASTER
#CLEANUP to remove some temp files that we don't need. These could be converted into arrays at a later point, but it makes it very simple to use files/grep.
/bin/rm stats.xml
/bin/rm id_title.list
/bin/rm livestreams.list
/bin/rm toadd.list
#This last line is useful for logging. If you run this script as a cronjob and send the output to a log file, you will see when the last time the script ran.
/bin/echo "Script finished at" `date`
Create a folder in the home directory of the user that will be running the script. Inside that folder, create a new file.
user@websvr:~$ nano nginx_watcher.sh
Edit the file
Paste the script into this file, and save it. Make the file executable by typing
user@websvr:~$ chmod +x nginx_watcher.sh
We are almost finished! Start a stream to the Nginx-RTMP server using your streaming software. Then on the webserver, run the script by typing
user@websvr:~$ ./nginx_watcher.sh
If all goes well, there will be no errors reported, and your WordPress site will have a new page set up for the stream. The live video should be playable through JWPlayer, and an m3u file will be available for download. You should also be able to stop the stream, run the script again, and the page will be updated to state the the stream is offline.
The last step is to create a cronjob for this script to run every minute. This will allow users to begin streaming and a page for them will be created no more than 1 minute after.
Type
user@websvr:~$ crontab -e
and create a job run every minute. Here’s mine:
*/1 * * * * /home/user/nginx_water/nginx_watcher.sh >> /home/user/nginx_watcher/log/nginx_watcher.log 2>&1
That will run the script every minute and send the output to a log file.
After that, your Nginx-RTMP/WordPress Frankenstein should be ready to roll!
Screenshots of it working!

Screenshot of the webpage when someone is actively streaming.
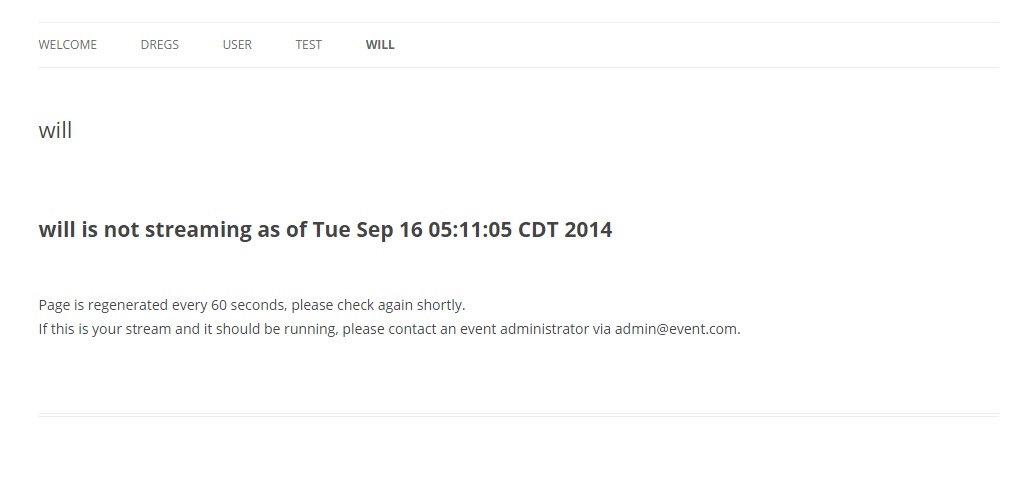
Screenshot of the webpage when that same person has stopped streaming.
If you have any questsions, please leave a comment below. If you have any suggestions for the script, I’d love to hear them. Thanks for reading.
Pingback: Local RTMP server with Website | WillStare