Category Archives: Game Servers

Customizing WordPress for RTMP

If you are following along in this mini-series, you should now have a fully functional nginx based RTMP server capable of receiving and broadcasting live video streams. As cool as that is, its not very user friendly, especially for potential viewers.

In this post we will go over the steps to get a frontend set up for our RTMP server. This will serve as a central hub for our streaming environment. It will host information about how to watch the streams, how to broadcast to the server, as well as some cool statistics. You will need the following.

  • Fully functional WordPress installation – This guide will not cover WordPress installation or configuration. There are dozens of quality guides on the internet for this. Basically you need an Ubuntu server running the LAMP stack.

So, let’s start!

Log into your fully up to date WordPress installation via the web browser. I have found a few customization options that make the website look better for streaming.

  1. Change the theme to “TwentyTwelve”. Its a simple, clean theme that won’t distract viewers.2012
  2. Remove all widgets from the side panel. This will clean up the pages even more. Removing the “meta” widget will remove the “login” link on the side of pages. To login in the future, you will have to go to your WordPress admin URL (ex. 10.0.0.242/wp-admin) .widgets
  3. Create a menu via the Appearance menu. In the menu options, click the checkbox for “Automatically add new top-level pages to this menu”. Also select Primary Menu. This will automatically make our links on the website when the script makes new pages. menu
  4. Create some informational pages for your viewers/streamers to learn about how to use the website to stream/watch streams. Here’s some screenshots of mine.
    How to stream

    A basic how-to guide on streaming to the RTMP server with OBS. This page also includes directions for Xsplit as well.

    statsfor nerds

    A simple iframe within a page that shows the RTMP stats. Not necessary, but its kind of cool 🙂

how to watch

A basic how to watch page with download links for VLC.

Local RTMP server with Website

I am starting a mini-series of posts on how to set up Nginx-RTMP and WordPress to create a local version of Twitch.tv. I will post detailed guides on installing and configuring all software required for this project.

Project requirements are as follows:

  • 1 or 2 Linux computers/VMs. All testing has been done with Ubuntu Server 14.04 64bit.
  • Nginx-RTMP with the stats plugin compiled.
  • A working WordPress installation. (not covered in this series)
  • Various command line utilities that will be covered in depth during the guide.

The end product will be a fully functional streaming server capable of handling 1gbps of video traffic, with a custom WordPress frontend for users to use to access the streams. The entire system is automated and requires minimal user input. A basic use-case is below.

Bob wants to stream his Dota game for the entire LAN party to see. The LAN has a limited bandwidth internet connection, so using a service like Twitch.tv is out of the question. However, the LAN execs have configured a local RTMP solution for him to use.

Bob configures his streaming software like he would normally, except he points his stream to the local RTMP server. He uses his gamer handle (b0b) as a stream key. At this point, Bob’s job is finished. He can start playing his game.

On the backend, a script reads that a new stream has started. It checks to see if this stream has been played before, or if this is a new stream all together. If its new, it adds the stream to the local database and creates a page on the WordPress site dedicated to Bob’s stream.  It then runs through every stream that has been registered to the server during the event. If the stream is active, like Bob’s, it updates the page with a JWPlayer configured specifically for Bob’s stream. It also generates an .m3u file with a playlist entry pointing towards Bob’s stream mount point.  Viewers can just navigate to Bob’s page on the WordPress site and start watching from within their web browser.

If some of the previously registered streams are offline, it updates their page with an offline message telling users to check back soon. By using this process, every single page is updated every 60 seconds via a cronjob.

So that’s a basic overview of what this setup can do.  It can listen for, create, and distribute live RTMP streams to viewers automatically and painlessly. And because all traffic is local, no internet bandwidth is wasted for redundant connections to websites like Twitch.tv or hitbox.

I will be making many more posts about how to set this up for your own event, so stay tuned. If you have any questions or comments, please leave a message below.

Part 1 – Install nginx rtmp tutorial here!

Part 2 – Customize WordPress tutorial here!

Part 3 – Finishing the RTMP WordPress Project here!

Part 4 – Virtual Machine Download here!

Install Mcmyadmin on Ubuntu 14.04 Server

I followed this guide: https://www.digitalocean.com/community/questions/how-to-install-mcmyadmin-and-start-it-up-for-the-first-time-not-a-question-a-howto-guide

It worked great until the end. Upon running the script, SSH session would get flooded with errors. At first it appeared that they were Java errors, but upon further inspection it appeared to be related to my SSH session itself. I was using SecureCRT, and by default some of the color codes from the Linux terminal are not enabled. Here is the error I was getting.

Running in 64-bit mode.
McMyAdmin Core Exception: Argument cannot be null.
Parameter name: format
[ERROR] FATAL UNHANDLED EXCEPTION: System.ArgumentNullException: Argument cannot be null.
Parameter name: format
at System.String.FormatHelper (System.Text.StringBuilder result, IFormatProvider provider, System.String format, System.Object[] args) [0x00000] in <filename unknown>:0
at System.String.Format (IFormatProvider provider, System.String format, System.Object[] args) [0x00000] in <filename unknown>:0
at System.String.Format (System.String format, System.Object arg0) [0x00000] in <filename unknown>:0
at System.TermInfoDriver.set_ForegroundColor (ConsoleColor value) [0x00000] in <filename unknown>:0
at System.ConsoleDriver.set_ForegroundColor (ConsoleColor value) [0x00000] in <filename unknown>:0
at System.Console.set_ForegroundColor (ConsoleColor value) [0x00000] in <filename unknown>:0
at nu.a (a A_0) [0x00000] in <filename unknown>:0
at nu.a () [0x00000] in <filename unknown>:0
at System.Threading.Thread.StartInternal () [0x00000] in <filename unknown>:0


As you can see, its all talking about colors. Mcmyadmin attempts to mirror Powershell in its color scheme, and that includes changing the background color to blue. For whatever reason SecureCRT doesn’t allow for this to happen, and the result is a bunch of errors. By switching to Putty, I was able to get the server up without an issue. I’ll include some screenshots below to show what I am talking about.

securecrt
SecureCRT throwing an error while connected.

putty
Putty working fine. Notice the blue background.

I hope this post helps anybody having issues with this problem. I couldn’t find anything online that helped. Comment below if you have questions.

Tutorial | How to make a high jump / low gravity server COD4

I spent a lot of time researching how to run a high jump or low gravity cod4 server, and I found a somewhat good solution to it. What follows is my duct-tape solution. 😀

**THIS ONLY WORKS FOR LEGIT SERVERS RUNNING PUNKBUSTER**

Once you have a functioning COD4 server, add this to the last line of your server.cfg

//Low Gravity
wait 1
exec lowgravity.cfg

Then make a new file and call it lowgravity.cfg

enter the following into it (you can change the parameters to suite your needs)

pb_sv_taskempty
jump_height 330
g_gravity 300
bg_fallDamageMinHeight 10000
bg_fallDamageMaxHeight 10000
pb_sv_task 30 30 “g_gravity 300”
pb_sv_task 30 30 “jump_height 330”
pb_sv_task 30 30 “bg_fallDamageMinHeight 10000”
pb_sv_task 30 30 “bg_fallDamageMaxHeight 10000”

That should work. I know that there is another way to do it, but I haven’t been able to coax it out of the server owner!

This will enable high jump / low gravity on your ranked COD4 server WITHOUT enabling cheats. Hopefully you can get some enjoyment out of it. If you have any suggestions or other ideas, please let me know below. Happy fragging!

How to have a high xp server in fourDeltaOne (mw2)

Some of you may be wondering how you can get your own high xp server in fourDeltaOne MW2. Here is a simple guide for the process.

First you will need a good, clean server.cfg . Here is one that I use for my high xp servers.

[spoiler]

// — QUERY INFORMATION ——————————–

set sv_hostname “server name!”

// optional settings returned by ‘serverinfo’ command
sets _Admin “”
sets _Email “”
sets _Website “”
sets _Location “”

// — NON-GAMEPLAY CONFIGURATION ———————–

set rcon_password “***********”
set sv_privatePassword “”
set privateMatch_serverPassword “”

set sv_maxPing “999”

set g_inactivity “180”
set g_inactivitySpectator “0”

set g_logSync “1”
sv log_damage “0”
set g_log “games_mp.log”

set aiw_sayName “^7Console”

set scr_teambalance “1”
set scr_player_maxhealth “25”
set scr_dm_score_kill “1000”

// — BASE GAME CONFIGURATION ————————–

set g_hardcore “1”
set ui_hud_hardcore “1”
set scr_hardcore “1”

//set scr_team_fftype “0”
set scr_player_healthregentime “0”

set g_speed “190”

set scr_thirdperson “0”

set scr_game_hardpoints “1”
set scr_game_perks “1”
set scr_game_spectatetype “1”
set scr_game_allowkillcam “1”

set scr_diehard “0”

// — GAMETYPE CONFIGURATION —————————

// – FFA

set scr_dm_scorelimit “45000”
set scr_dm_timelimit “20.0”

set scr_dm_playerrespawndelay “-1”

set scr_dm_numlives “0”
set scr_dm_promode”0″

// – Team Deathmatch

set scr_war_scorelimit “150000”
set scr_war_timelimit “20.0”

set scr_war_playerrespawndelay “-1”
set scr_war_waverespawndelay “0”

set scr_war_numlives “0”
set scr_war_promode “0”

set scr_war_roundlimit “1”
set scr_war_winlimit “1”

// — AUTOMATED ROTATION ——————————-

set sv_mapRotation “gametype dm map mp_rust”

[/spoiler]

In case you missed it, the key parameter added was…

set scr_dm_score_kill “1000”

That will set FFA scores to 1000 per kill. you can change it to set scr_war_score_kill”1000″ to do it for TDM, and you can figure out the rest. Make sure to use a clean simple config though, as it may crash your server if you don’t. Good luck!

fourdeltaone mw2 rcon hacked?

Apparently there is a way to exploit rcon in cod4/mw2 servers where the hacker is able to retrieve the server.cfg file remotely and then in turn get the rcon password. Then they can do whatever they want. Here is my solution to that problem.

1) Take your server down
2) change your rcon password in the server.cfg
3) rename your server.cfg file to something else (ex. 213456789.cfg)
4) edit your shortcut so it says exec 213456789.cfg instead of server.cfg
5) start up the server. the hacker will need to know the file name of the config, which will be nigh impossible to guess. After doing these steps the hackers stopped attacking my servers.

Reply below if you used this method and are still having problems!

Tutorial | How to install fourDeltaOne dedicated server

For this tutorial you will need:

Steam modernwarfare 2 files
fourDeltaOne client files from here
fourDeltaOne dedicated server updater which can be found here
Microsoft .NET Framework 3.5

Once you have these files, you’re ready for the fun stuff!

Step 1.
Make a new copy of your mw2 steam folder. Name it something useful, such as “FD1 Server”

Step 2.
Run the client installer, making sure to select the folder where the server is (C:/FD1 Server/)

Step 3.
Place the files from dsut.zip into the root folder of your server install (C:/FD1 Server/)
Run the iw4m_updater.exe and let it download the files.

Step 4.
Navigate to your C:/users/(your name) /appdata/local/iw4m/ and copy all of the files into your server folder (C:/FD1 Server/)


what your server folder should now look like


Step 5.
Make a shortcut to iw4m.exe on your desktop. If you don’t have one, rename the iw4m.dat to exe. Add the following parameters ( -dedicated +set party_maxplayers 18+set net_port 28961 +exec server.cfg +map oilrig +map_rotate) to the shortcut if you want an 18 player server running on port 28961 using the server.cfg that you have configured, loading OilRig as the map.

Step 6.
At this point your server should be functional. But we still need a few more things, such as a server.cfg. Here is an example of a server.cfg. remember to change the things you want different. Place this in C:/FD1/Main/

[spoiler]

// — QUERY INFORMATION ——————————–
set sv_hostname “I am Lazy”

// optional settings returned by query, server listings may use this
sets _Admin “NTAuthority”
sets _Email “ntauthority@example.com”
sets _Website “http://alteriw.net/”
sets _Location “EU – West”

// — NON-GAMEPLAY CONFIGURATION ———————–
set rcon_password “” // password for rcon, empty = disabled
set privateMatch_serverPassword “” // game password, leave empty for a public game

set sv_maxPing “300” // maximum ping, any higher and players will get kicked

set g_inactivity “0” // time in seconds before a player gets kicked if not moving
set g_inactivitySpectator “0” // time in seconds before a spectator gets kicked

set g_logSync “1” // 1 = always flush games_mp.log, 0 = only flush on game end
set g_log “games_mp.log” // game log file

set aiw_sayName “^7Console” // name server-side ‘say’ commands show up as

// — BASE GAME CONFIGURATION ————————–
set g_gametype “sd” // game type
// war – Team Deathmatch
// dm – Free-for-all
// dom – Domination
// koth – Headquarters
// sab – Sabotage
// sd – Search and Destroy
// arena – Arena
// dd – Demolition
// ctf – Capture the Flag
// oneflag – One-Flag CTF
// gtnw – Global Thermo-Nuclear War

// uncomment below commands for some hardcore shit
//set g_hardcore “1”
//set ui_hud_hardcore “1”
//set scr_hardcore “1”
//set scr_player_maxhealth “30”
//set scr_team_fftype “1” // 1 = on, 2 = reflect, 3 = shared
//set scr_player_healthregentime “0”

set scr_thirdperson “0” // third-person mode
set scr_game_hardpoints “1” // killstreaks, 1 = on
set scr_game_perks “1” // perks, obviously

set scr_game_allowkillcam “1” // 1 = allow, 0 = disallow

set scr_diehard “0” // die-hard mode

set scr_teambalance “1” // player difference for game to consider ‘unbalanced’
set scr_game_spectatetype “2” // by request?

// — GAMETYPE CONFIGURATION —————————

// – Team Deathmatch
set scr_war_scorelimit “10000”
set scr_war_timelimit “15” // timelimit, in minutes

set scr_war_playerrespawndelay “-1” // -1 is no respawn delay, 0 is automatic, > 0 is X seconds
set scr_war_waverespawndelay “0” // wave spawning, might be more ‘tactical’

set scr_war_numlives “0” // number of lives
set scr_war_promode “0” // unknown

set scr_war_roundlimit “1” // maximum amount of rounds
set scr_war_winlimit “1” // amount of wins needed to win a round-based game

// – Domination
set scr_dom_scorelimit “200”
set scr_dom_timelimit “60” // timelimit, in minutes

set scr_dom_playerrespawndelay “-1” // -1 is no respawn delay, 0 is automatic, > 0 is X seconds
set scr_dom_waverespawndelay “0” // wave spawning, might be more ‘tactical’

set scr_dom_numlives “0” // number of lives
set scr_dom_promode “0” // unknown

set scr_dom_roundlimit “1” // maximum amount of rounds
set scr_dom_winlimit “1” // amount of wins needed to win a round-based game

// – FFA
set scr_dm_scorelimit “10000”
set scr_dm_timelimit “15” // timelimit, in minutes

set scr_dm_playerrespawndelay “-1” // -1 is no respawn delay, 0 is automatic, > 0 is X seconds

set scr_dm_numlives “0” // number of lives
set scr_dm_promode “0” // unknown

// – Search and Destroy
set scr_sd_scorelimit “1”
set scr_sd_timelimit “2.5” // timelimit, in minutes

set scr_sd_playerrespawndelay “-1” // -1 is no respawn delay, 0 is automatic, > 0 is X seconds
set scr_sd_waverespawndelay “0” // wave spawning, might be more ‘tactical’

set scr_sd_numlives “1” // number of lives
set scr_sd_promode “0” // unknown

set scr_sd_roundlimit “24” // maximum amount of rounds, 0 is ‘until someone wins’
set scr_sd_winlimit “0” // amount of wins needed to win a round-based game
set scr_sd_roundswitch “12” // after X rounds, switch sides?

set scr_sd_bombtimer “45”
set scr_sd_defusetime “5”
set scr_sd_multibomb “0” // allow multiple people to ‘have the bomb’?
set scr_sd_planttime “5”

// … other gametypes might be easy to figure out, or come in a future update of the template …

// — AUTOMATED ROTATION ——————————-
set sv_mapRotation “gametype sd map mp_afghan gametype sd map mp_fuel2 gametype sd map mp_derail gametype sd map mp_crash gametype sd map mp_nightshift”

[/spoiler]

Step 7.
If you’re hosting this at your house, you will need to portforward. Just google it, this isn’t a tutorial on that. Basically, you will have to port forward the port that the game is running on (in this case 28961)

Step 8.
Run the shortcut. You should see it load your config file, and begin working. Go to the game, and browse for your server. If its on your network, you should be able to see it, and connect.

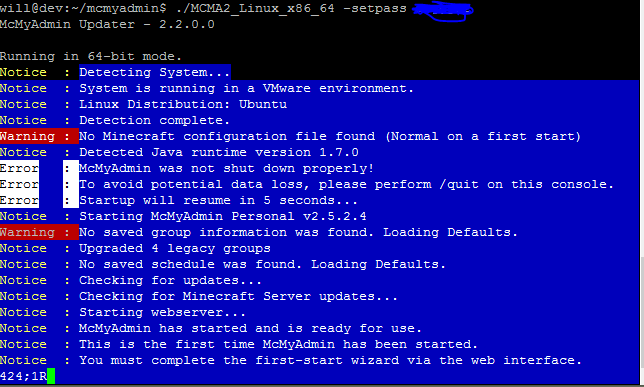
This is what it should look like if it loaded your cfg and everything is working


If your server is running sluggish, try adding the -console parameter in the shortcut. It will change it back to the old console.

Leave any questions below. Thanks!