Monthly Archives: September 2014

RTMP WordPress VM download

VIRTUAL MACHINE DOWNLOAD

I made 2 virtual machines (VMware workstation 8.0 compatable) that are ready for deployment in your LAN. You’ll want to run these on a decent ESXi or VMware workstation host with a 1gbps or higher connection. Just download these machines and import them. You’ll probably want to assign a static IP address to these before you send them into production. On the WordPress website you’ll want to change a few of the links to match up with your system’s IP addresses.

Both VMs are running up to date (as of 2014-09-21) Ubuntu 14.04 64bit. The streaming server is set for 4 cores, so if your VM host only has a dual core you should adjust that. They require a combined 3gb of ram.

They are fully configured, and WordPress is installed and customized exactly how the guide shows.

Credentials for both (you should probably change these)

Username: streamer
Password: dh2n7

These will work for logging into the operating system, mysql/phpmyadmin root account, and WordPress admin account (wpress database for the website will use a different password).

WordPress credentials:

Database username: wpress
Database password: m3c6x

Again, you should probably change these!

VIRTUAL MACHINE DOWNLOAD

Finishing the RTMP WordPress project

If you have been following these tutorials, you should now have a fully functional Nginx RTMP server as well as a WordPress site optimized for showing live streams.

We just need to install a few more things and this project will be complete!

The first package we need is wp-cli. This program will allow us to modify our WordPress site from the CLI! Cool!

 user@websvr:~$ wget https://raw.githubusercontent.com/wp-cli/builds/gh-pages/phar/wp-cli.phar 

Check to see if it works by typing

 user@websvr:~$ php wp-cli.phar --info 

If it works, we can make it an executable so you just type “wp” to call it.

user@websvr:~$ chmod +x wp-cli.phar

user@websvr:~$ sudo mv wp-cli.phar /usr/local/bin/wp 

That’s all we have to do to enable wp-cli. Next we need to install xmlstarlet, a utility to parse xml files.

 user@websvr:~$ sudo apt-get install xmlstarlet 

After that installs, we are finished adding software to the server.  Everything else should be included in your distro.

The script we will be using automatically generates .m3u playlist files that will need a directory in the webserver to reside. I like to use an ‘assets’ folder, but you can name it anything you’d like. Make a folder in the www root of your webserver, where WordPress is installed. After we create the folder, we must ‘chown’ it, which means change owner. Change ownership to the user that will be running the script.

 user@websvr:~$ sudo mkdir /var/www/html/assets/

user@websvr:~$ sudo chown user /var/www/html/assets/ 


What follows is a custom script that will allow the WordPress site to update based on the status of the nginx RTMP server. It will require some input before you run it, but once its set it can take care of itself.


#!/bin/bash

#MASTER contains a list of registered usernames for the event. To clear it, simply delete the file!
MASTER="rtmp_users.list"

#Enter the path to this script. Follow this syntax. Note the absence of a trailing '/' (ex: /home/user/scripts)
SCRIPT_PATH=
#Enter the path to your WordPress installation. Follow this syntax. Note the absence of a trailing '/' (ex: /var/www/html)
WP_PATH=
#Enter the URL of the Nginx statistics page. (ex: http://10.0.0.241/stats)
NGINX_STATS=
#Enter the path to the HTML assets folder. This is where the server will hold the .m3u files. YOU MUST CHOWN this folder! (ex: /var/www/html/assets)
ASSETS=
#Enter the URL to the assets folder. (ex: http://10.0.0.241/assets)
WEB_ASSETS=
#Enter the RTMP server path. (ex: rtmp://10.0.0.242/live)
RTMP_PATH=
#Optional: Enter the path to a background image for JWPLayer. (ex: http://10.0.0.241/assets/site_logo.png)
IMAGE_PATH=
#Changes directory to the script-path for execution (required for cron)
cd $SCRIPT_PATH
#Creating the master list file.
MASTER="rtmp_users.list"
/bin/touch $MASTER
/bin/touch toadd.list
/bin/rm toadd.list
/bin/touch toadd.list
#Getting the current statistics from the streaming server
wget -O stats.xml $NGINX_STATS
#Parsing the XML file to get all the handles/keys currently streaming. These should correspond with the usernames of the streamers.
xmlstarlet sel -t -m '//name' -v . -n <stats.xml | grep -v live > livestreams.list
#The loop below cycles through the livestreams.list file and compares each line to the current master list. If it doesn't exist, it adds it to the master list. It also adds it to the list of things we need to add to the website.
while read NAME
do
if ! /bin/grep -Fxq $NAME $MASTER; then
echo $NAME >> $MASTER
echo $NAME >> toadd.list
fi
done <livestreams.list
#Getting the existing post titles and ID's from WordPress. These will be compared to the currently active streams.
/usr/local/bin/wp --path=$WP_PATH post list --post_type=page --fields=ID,post_title > $SCRIPT_PATH/id_title.list
#Loop to find names to add. If they don't exist, a new page is created for them. This will display at the top of the menu. It is currently empty at this stage.
while read NEW; do
if ! /bin/grep $NEW id_title.list; then
/usr/local/bin/wp --path=$WP_PATH post create --post_type=page --post_status=publish --post_title=$NEW
fi
done <$MASTER
#The loop below checks to see if the stream is currently live or dead (depends on if its in the livestreams.list file). If its live, it generates a page with the relavent
#stream information customized for the user. If its dead, it will generate a dead page to notify browsers that the user is not currently streaming. This loop will update
# ALL streams in the master_rtmp.list as often as the cronjob is executed.
while read STREAM; do
ID=`/usr/local/bin/wp --path=$WP_PATH post list --post_type=page --fields=ID,post_title | /bin/grep $STREAM | /usr/bin/awk '{print $1}'`
if /bin/grep $STREAM livestreams.list; then
echo $STREAM" is online"
/bin/echo $RTMP_PATH/$STREAM > $ASSETS/$STREAM.m3u
/bin/echo "<html>" >> $STREAM.livetemplate.html
/bin/echo "<head>" >> $STREAM.livetemplate.html
/bin/echo "<script src=http://jwpsrv.com/library/UjjVOi7iEeSiiiIAC0MJiQ.js></script>" >> $STREAM.livetemplate.html
/bin/echo "</head>" >> $STREAM.livetemplate.html
/bin/echo "<body>" >> $STREAM.livetemplate.html
/bin/echo "<div id="$STREAM"></div>" >> $STREAM.livetemplate.html
/bin/echo "<script>// <![CDATA[" >> $STREAM.livetemplate.html
/bin/echo "jwplayer('"$STREAM"').setup({ file: '"$RTMP_PATH/$STREAM"', image: '//"$IMAGE_PATH"', title: '$NEW', width: '100%', aspectratio: '16:9' });" >> $STREAM.livetemplate.html
/bin/echo "// ]]></script>" >> $STREAM.livetemplate.html
/bin/echo $STREAM" is online and streaming as of "`date` >> $STREAM.livetemplate.html
/bin/echo "<a href="$WEB_ASSETS/$STREAM".m3u>VLC LINK</a> (Right Click and Save-as)" >> $STREAM.livetemplate.html
/bin/echo "</body>" >> $STREAM.livetemplate.html
/bin/echo "</html>" >> $STREAM.livetemplate.html
LIVE_HTML=`cat $STREAM.livetemplate.html`
/usr/local/bin/wp --path=$WP_PATH post update $ID --post_content="$LIVE_HTML"
/bin/rm $STREAM.livetemplate.html
else
/bin/echo $STREAM" is offline"
/bin/echo "<html>" >> $STREAM.deadtemplate.html
/bin/echo "<head></head>" >> $STREAM.deadtemplate.html
/bin/echo "<h1>"$STREAM" is not streaming as of "`date`" </h1>" >> $STREAM.deadtemplate.html
/bin/echo "<body>" >> $STREAM.deadtemplate.html
/bin/echo "Page is regenerated every 60 seconds, please check again shortly." >> $STREAM.deadtemplate.html
/bin/echo "If this is your stream and it should be running, please contact an event administrator." >> $STREAM.deadtemplate.html #This string can be modified to meet your requirements.
/bin/echo "</body>" >> $STREAM.deadtemplate.html
/bin/echo "</html>" >> $STREAM.deadtemplate.html
DEAD_HTML=`cat $STREAM.deadtemplate.html`
/usr/local/bin/wp --path=$WP_PATH post update $ID --post_content="$DEAD_HTML"
/bin/rm $STREAM.deadtemplate.html
fi
done <$MASTER
#CLEANUP to remove some temp files that we don't need. These could be converted into arrays at a later point, but it makes it very simple to use files/grep.
/bin/rm stats.xml
/bin/rm id_title.list
/bin/rm livestreams.list
/bin/rm toadd.list
#This last line is useful for logging. If you run this script as a cronjob and send the output to a log file, you will see when the last time the script ran.
/bin/echo "Script finished at" `date` 

Create a folder in the home directory of the user that will be running the script. Inside that folder, create a new file.

 user@websvr:~$ nano nginx_watcher.sh 

Edit the file

Paste the script into this file, and save it. Make the file executable by typing

 user@websvr:~$ chmod +x nginx_watcher.sh 


We are almost finished! Start a stream to the Nginx-RTMP server using your streaming software.  Then on the webserver, run the script by typing

 user@websvr:~$ ./nginx_watcher.sh 

If all goes well, there will be no errors reported, and your WordPress site will have a new page set up for the stream. The live video should be playable through JWPlayer, and an m3u file will be available for download. You should also be able to stop the stream, run the script again, and the page will be updated to state the the stream is offline.

The last step is to create a cronjob for this script to run every minute. This will allow users to begin streaming and a page for them will be created no more than 1 minute after.

Type

 user@websvr:~$ crontab -e 

and create a job run every minute. Here’s mine:

 */1 * * * * /home/user/nginx_water/nginx_watcher.sh >> /home/user/nginx_watcher/log/nginx_watcher.log 2>&1 

That will run the script every minute and send the output to a log file.

After that, your Nginx-RTMP/WordPress Frankenstein should be ready to roll!

Screenshots of it working!

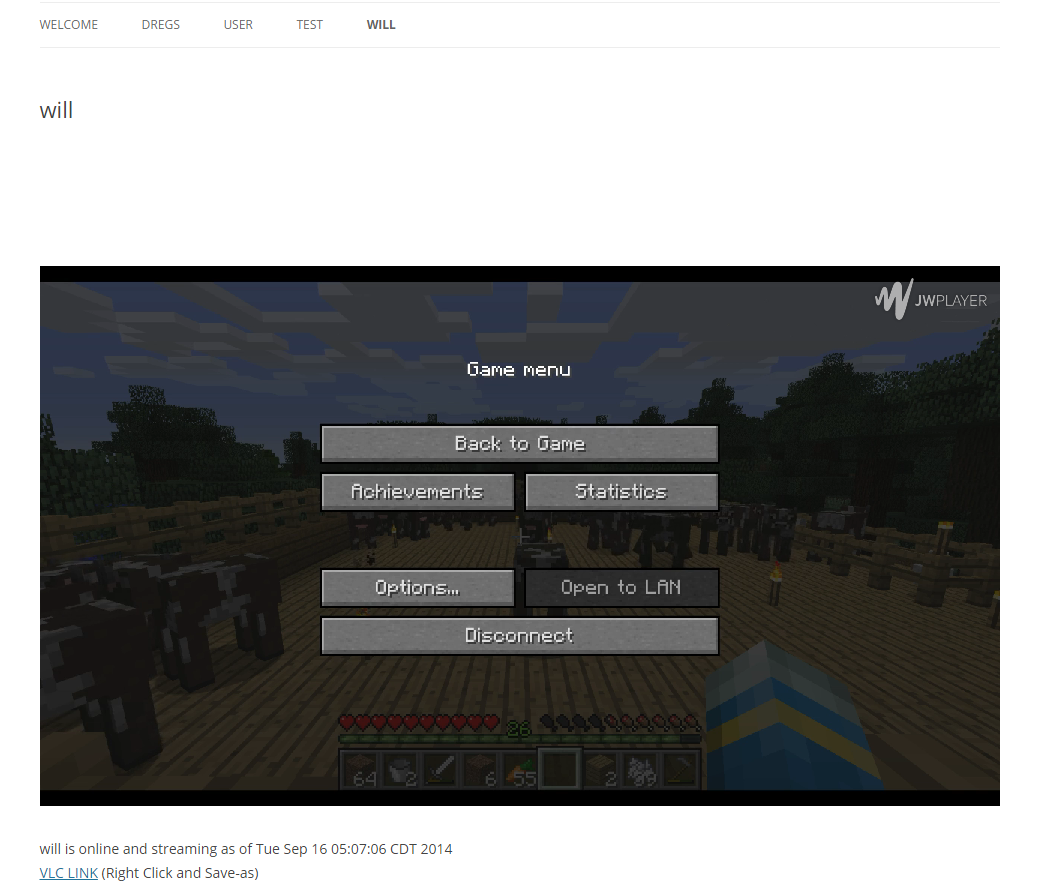
Screenshot of the webpage when someone is actively streaming.

Screenshot of the webpage when someone is actively streaming.

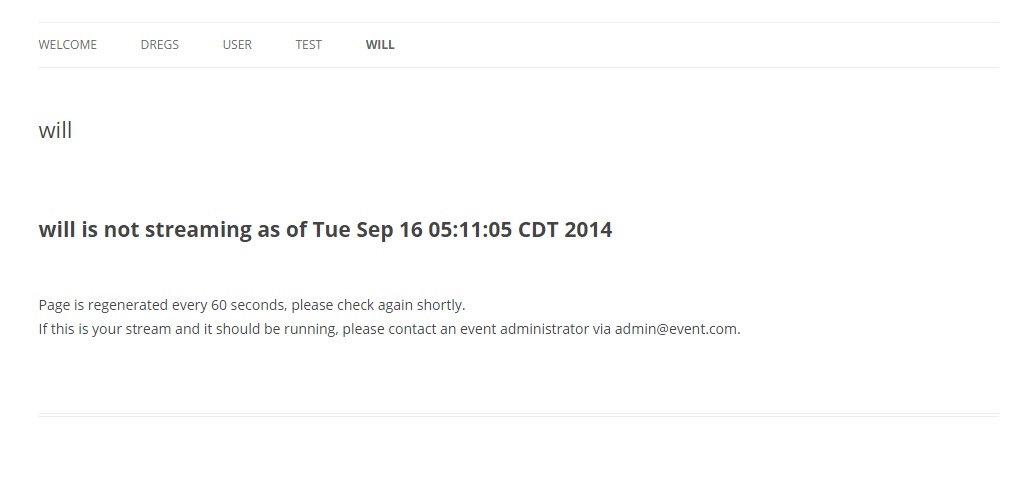
Screenshot of the webpage when that same person has stopped streaming.

Screenshot of the webpage when that same person has stopped streaming.

I plan on releasing some prebuilt virtual machines soon for download for those who just want to get something running. THEY’RE HERE!

If you have any questsions, please leave a comment  below. If you have any suggestions for the script, I’d love to hear them. Thanks for reading.

Customizing WordPress for RTMP

If you are following along in this mini-series, you should now have a fully functional nginx based RTMP server capable of receiving and broadcasting live video streams. As cool as that is, its not very user friendly, especially for potential viewers.

In this post we will go over the steps to get a frontend set up for our RTMP server. This will serve as a central hub for our streaming environment. It will host information about how to watch the streams, how to broadcast to the server, as well as some cool statistics. You will need the following.

  • Fully functional WordPress installation – This guide will not cover WordPress installation or configuration. There are dozens of quality guides on the internet for this. Basically you need an Ubuntu server running the LAMP stack.

So, let’s start!

Log into your fully up to date WordPress installation via the web browser. I have found a few customization options that make the website look better for streaming.

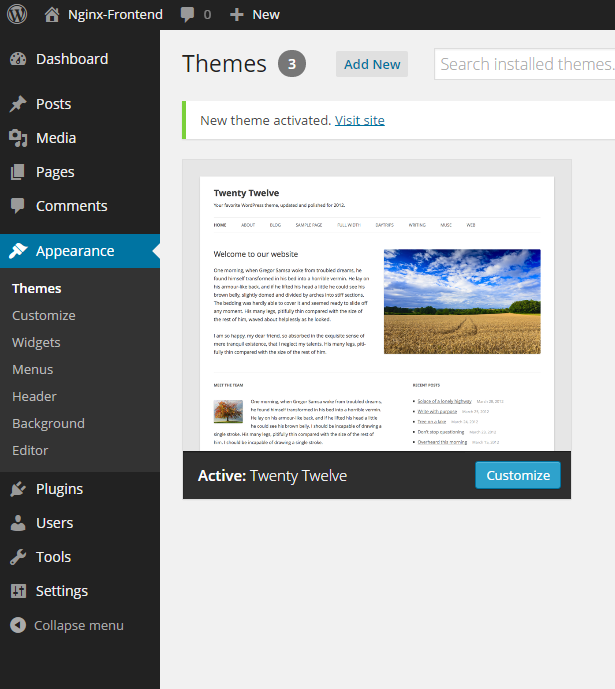
  1. Change the theme to “TwentyTwelve”. Its a simple, clean theme that won’t distract viewers.2012
  2. Remove all widgets from the side panel. This will clean up the pages even more. Removing the “meta” widget will remove the “login” link on the side of pages. To login in the future, you will have to go to your WordPress admin URL (ex. 10.0.0.242/wp-admin) .widgets
  3. Create a menu via the Appearance menu. In the menu options, click the checkbox for “Automatically add new top-level pages to this menu”. Also select Primary Menu. This will automatically make our links on the website when the script makes new pages. menu
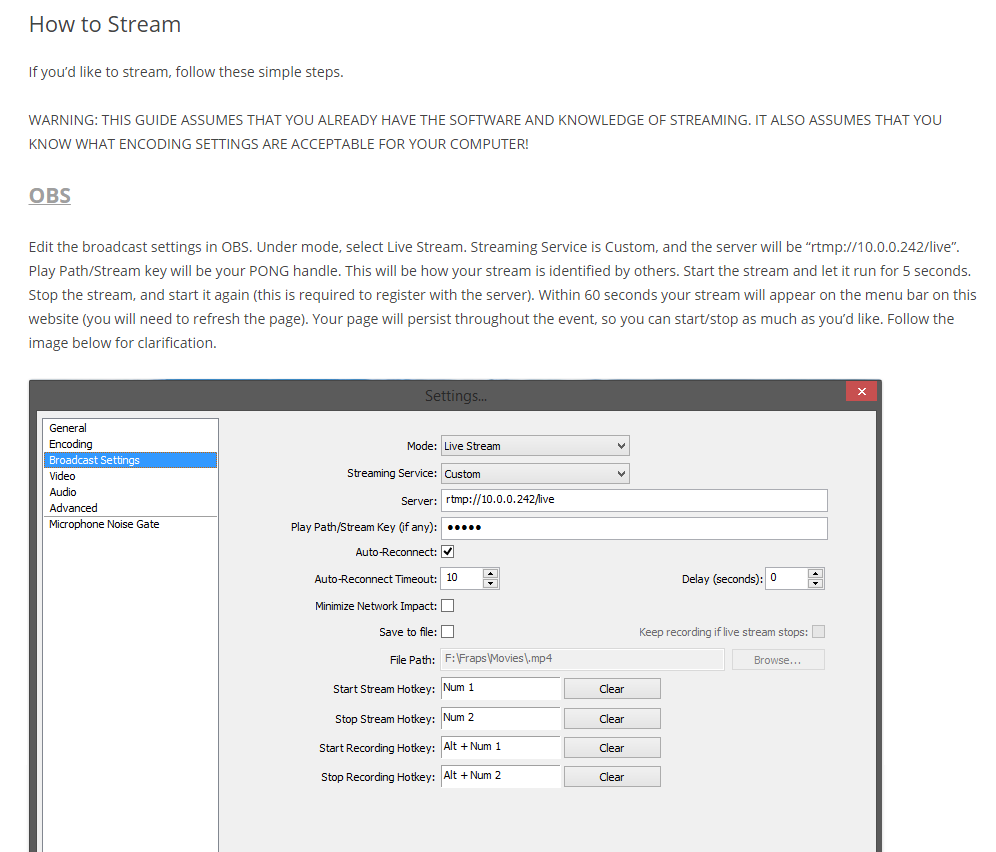
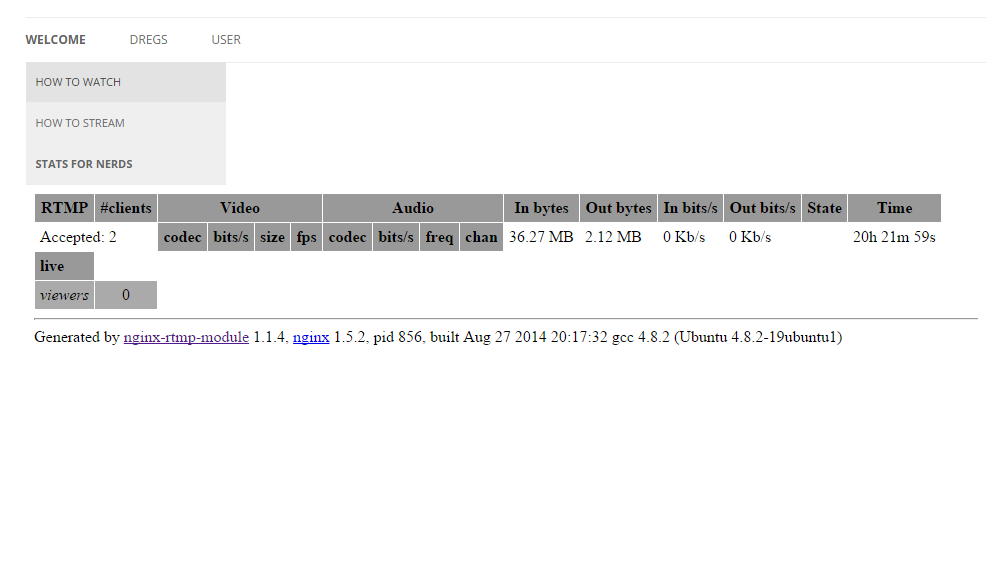
  4. Create some informational pages for your viewers/streamers to learn about how to use the website to stream/watch streams. Here’s some screenshots of mine.
    How to stream

    A basic how-to guide on streaming to the RTMP server with OBS. This page also includes directions for Xsplit as well.

    statsfor nerds

    A simple iframe within a page that shows the RTMP stats. Not necessary, but its kind of cool 🙂

how to watch

A basic how to watch page with download links for VLC.

Install nginx-rtmp server

For this guide I am following this post.

Requirements

For this guide you will need an up to date Ubuntu Server 14.04 virtual or physical machine.

Update your operating system. If you’re on Ubuntu, its a simple process. Simply type

 user@websvr:~$ sudo apt-get update 

After that, just type

 user@websvr:~$ sudo apt-get upgrade 

This will download updates for all the installed software. When that finishes, we need to grab the dependencies for nginx. Type or paste the following into the server.

 user@streamsvr:~$ sudo apt-get install build-essential libpcre3 libpcre3-dev libssl-dev

Now that we have the dependencies, we can download the source code of nginx from their webpage.  As of this post, the most recent version is 1.7.4. To download it, type the following.

 user@streamsvr:~$ wget http://nginx.org/download/nginx-1.7.4.tar.gz

We also need to grab the RTMP module because it isn’t included in the main nginx distribution.

 user@streamsvr:~$ wget https://github.com/arut/nginx-rtmp-module/archive/master.zip 

Before we continue, we need to install the unzip program.

 user@streamsvr:~$ sudo apt-get install unzip 

Now we open the archives we downloaded and get cracking!

 user@streamsvr:~$ tar -zxvf nginx-1.7.4.tar.gz
user@streamsvr:~$ unzip master.zip
user@streamsvr:~$ cd nginx-1.7.4/ 

We can now configure the source and build the binary.

user@streamsvr:~/nginx-1.7.4$ ./configure --with-http_ssl_module --add-module=../nginx-rtmp-module-master
user@streamsvr:~/nginx-1.7.4$ make
user@streamsvr:~/nginx-1.7.4$ sudo make install

Now nginx is installed! It is install ed in /usr/local/nginx. To start it type

 user@streamsvr:~$ sudo /usr/local/nginx/sbin/nginx 

Test it by going to your server IP with your web browser. It should display the following:
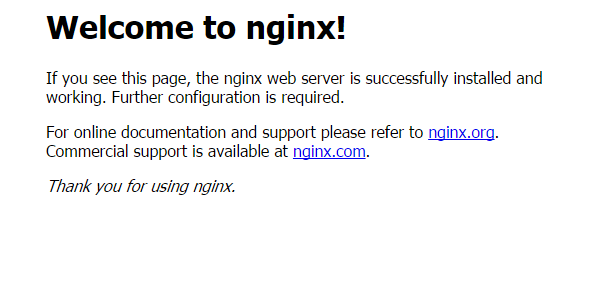
nginx installed

We are almost done. To add RTMP functionality, we must enable it in the nginx configuration file.

 user@streamsvr:~$ sudo nano /usr/local/nginx/conf/nginx.conf 

Paste this in at the end of the file.

rtmp {
        server {
                listen 1935;
                chunk_size 4096;

                application live {
                        live on;
                        record off;
                }
        }
}

To save, hit Crtl+x , yes, and enter.

To make the rest of the project easier, we should make nginx into a system service that runs automatically and can be controlled with the service command.

 sudo nano /etc/init/nginx.conf 

Paste this into the file

# nginx

description "nginx http daemon"
author "Philipp Klose <me@'thisdomain'.de>"

start on (filesystem and net-device-up IFACE=lo)
stop on runlevel [!2345]

env DAEMON=/usr/local/nginx/sbin/nginx
env PID=/var/run/nginx.pid

expect fork
respawn
respawn limit 10 5
#oom never

pre-start script
 $DAEMON -t
 if [ $? -ne 0 ]
 then exit $?
 fi
end script

exec $DAEMON

We can now start and stop nginx with the sudo service nginx start | stop | restart commands. Yes! It will also start when the server boots, so you don’t need to worry about that.

Next we need to go back to the nginx configuration file and prepare it for stats delivery. The ability to display server statistics will be crucial to this project. This page will ensure that live streams have the correct pages generated for them.

Go back to the nginx configuration and add the following inside the server directive in the /usr/local/nginx/conf/nginx.conf.

# rtmp statistics
        location /viewers {
            rtmp_stat all;
            rtmp_stat_stylesheet stat.xsl;
        }

        location /stat.xsl {
            # you can move stat.xsl to a different location
            # under linux you could use /var/user/www for example
            root html;
}

The server directive should now start like this:


server {
listen 80;
server_name localhost;

#charset koi8-r;

#access_log logs/host.access.log main;

location / {
root html;
index index.html index.htm;
}
#rtmp statistics
location /viewers {
rtmp_stat all;
rtmp_stat_stylesheet stat.xsl;
}

location /stat.xsl {
# you can move stat.xsl to a different location
# under linux you could use /var/user/www for example
root html;
}
#error_page 404 /404.html; 

We have to do one more quick thing before the stats page will work. In order to generate the XML, the RTMP module uses an XSL file. This will need to be placed in the HTML root of the nginx server. Create a file called stat.xsl containing the following. Save it, and we should be good to go. For whatever reason, pasting the stat.xsl file into this page is messing things up, so I’ll just include a link to the file. 

 user@streamsvr:~$ sudo nano /usr/local/nginx/html/stat.xsl 

After you paste that in, save the nginx configuration. Restart the entire server. After it boots should be able to see the rtmp server stats if you go to your server IP address /viewers.

And that’s it for the nginx-rtmp installation/configuration. The server is now running and ready for the next section of this series… Web server configuration and scripting!


Local RTMP server with Website

I am starting a mini-series of posts on how to set up Nginx-RTMP and WordPress to create a local version of Twitch.tv. I will post detailed guides on installing and configuring all software required for this project.

Project requirements are as follows:

  • 1 or 2 Linux computers/VMs. All testing has been done with Ubuntu Server 14.04 64bit.
  • Nginx-RTMP with the stats plugin compiled.
  • A working WordPress installation. (not covered in this series)
  • Various command line utilities that will be covered in depth during the guide.

The end product will be a fully functional streaming server capable of handling 1gbps of video traffic, with a custom WordPress frontend for users to use to access the streams. The entire system is automated and requires minimal user input. A basic use-case is below.

Bob wants to stream his Dota game for the entire LAN party to see. The LAN has a limited bandwidth internet connection, so using a service like Twitch.tv is out of the question. However, the LAN execs have configured a local RTMP solution for him to use.

Bob configures his streaming software like he would normally, except he points his stream to the local RTMP server. He uses his gamer handle (b0b) as a stream key. At this point, Bob’s job is finished. He can start playing his game.

On the backend, a script reads that a new stream has started. It checks to see if this stream has been played before, or if this is a new stream all together. If its new, it adds the stream to the local database and creates a page on the WordPress site dedicated to Bob’s stream.  It then runs through every stream that has been registered to the server during the event. If the stream is active, like Bob’s, it updates the page with a JWPlayer configured specifically for Bob’s stream. It also generates an .m3u file with a playlist entry pointing towards Bob’s stream mount point.  Viewers can just navigate to Bob’s page on the WordPress site and start watching from within their web browser.

If some of the previously registered streams are offline, it updates their page with an offline message telling users to check back soon. By using this process, every single page is updated every 60 seconds via a cronjob.

So that’s a basic overview of what this setup can do.  It can listen for, create, and distribute live RTMP streams to viewers automatically and painlessly. And because all traffic is local, no internet bandwidth is wasted for redundant connections to websites like Twitch.tv or hitbox.

I will be making many more posts about how to set this up for your own event, so stay tuned. If you have any questions or comments, please leave a message below.

Part 1 – Install nginx rtmp tutorial here!

Part 2 – Customize WordPress tutorial here!

Part 3 – Finishing the RTMP WordPress Project here!

Part 4 – Virtual Machine Download here!

Strange hosts file entry

For the past week or so I was having random redirect issues. It was actually happening when I was checking this website (willstare.com). I finally had enough and did some scans on my PC. One of them scanned my HOSTS file and spit out a little nugget for me. Somehow I had an entry for pagead2.googlesyndication.com pointing toward 194.145.200.27. That was obviously not supposed to be there, so I did some digging to find out who that IP was.

It turns out it was a website based in the Netherlands called http://www.devianceprojects.com/. I still have no idea how that got there, but I will be more vigilant while cruising the web. I emailed the administrators for that site asking if they had any idea why that entry would be in  my hosts file, but they haven’t gotten back to me yet. I will update this is I get any more information. I have included my hosts file below to show what it looked like.


# Copyright (c) 1993-2009 Microsoft Corp.
#
# This is a sample HOSTS file used by Microsoft TCP/IP for Windows.
#
# This file contains the mappings of IP addresses to host names. Each
# entry should be kept on an individual line. The IP address should
# be placed in the first column followed by the corresponding host name.
# The IP address and the host name should be separated by at least one
# space.
#
# Additionally, comments (such as these) may be inserted on individual
# lines or following the machine name denoted by a '#' symbol.
#
# For example:
#
# 102.54.94.97 rhino.acme.com # source server
# 38.25.63.10 x.acme.com # x client host

# localhost name resolution is handled within DNS itself.
# 127.0.0.1 localhost
# ::1 localhost

194.145.200.27 pagead2.googlesyndication.com 

Ducky Zero Shine TKL review

I got my first mechanical keyboard the other day, a Ducky Zero Shine Tenkeyless. I’m just going to say a few things about it in case you’re interested in buying it.

First of all, it feels great. The craftsmanship is excellent, and it has a decent weight to it. The keycaps are smooth, but they have a little texture so it doesn’t feel like your fingers will slide right off. I have the Cherry MX Brown switches in mine, and they are pretty quiet. All noise is from the keys bottoming out, and this will get better the longer I use the keyboard.

The lighting is nice, but I have a few problems with it that I haven’t been able to figure out. The F1 and F5 keys are used for setting the repeat rate for the key presses. If the keyboard lighting is on at all, those keys are fully lit all the time. I haven’t figured out a way to have them be the same brightness of every other key. It isn’t a big problem though, and if it gets too annoying I just turn off the lights completely.

I am still getting used to the TKL design. I usually use the numpad for entering IP addresses, and for hitting enter when typing in a website that only requires one hand. However, I don’t miss it enough to want a full size keyboard again. My laptop has no numpad either, so it hasn’t been a hard transition for me.

All in all I am pleased with my keyboard. It feels absoultely wonderful to type on, and I think it will last a long time. If you have any questions, please leave a comment below. I’d be happy to help you with them.

SKU DK2087S-BUSALAAB1

Storja Tech Update

MapZTuuJ

Well, it appears that Storja was just another scam. After my first post, many people commented with their own insight on the company. The following is what we have figured out:

  • They posted information about multiple “conferences” where applicants would need to pay $50 for a chance to speak to HR.
  • No refunds were ever given to those who were unable to interview (everyone).
  • All major job posting sites removed their ads, craigslist ended up being the only source of their advertising.
  • Very few people were “hired”, but they never got a paycheck. Checks that were sent out bounced.

So at the end of the day, it looks like Storja was a somewhat sophisticated scam. It got people to hand over personal information (maybe even social security numbers), as well as at least $50. They got a lot of publicity with their wild claims of changing the world, but in the end it was hogwash.

I’m pretty bummed that they didn’t have a revolutionary technology lurking in their labs. I was really looking forward to having TB/s internet speeds for free.

If you have any more information or comments, please leave them below. If you have information about other companies trying to do the same thing, let me know. I like investigating these things, they can be really interesting.